Formatting is the key when it comes to writing papers, whether you are in school, college, university or a workplace. And while looking at professionally written papers with impressive formatting might intimidate you, you will be amazed how easy it is do so. Adding simple indents or hanging indents to make your paper better is something that can be done almost effortlessly.
What is a Hanging Indent?
First, lets see what an indent is. An indent can be described as starting a line at different distance from the margin as compared to the rest of the test.
When you create a first line indent, you are increasing the distance of the beginning of the first line from the margin while keeping all the other lines adjacent to the margin. It is quite similar to how you used to write paragraphs in a story or an essay at school.
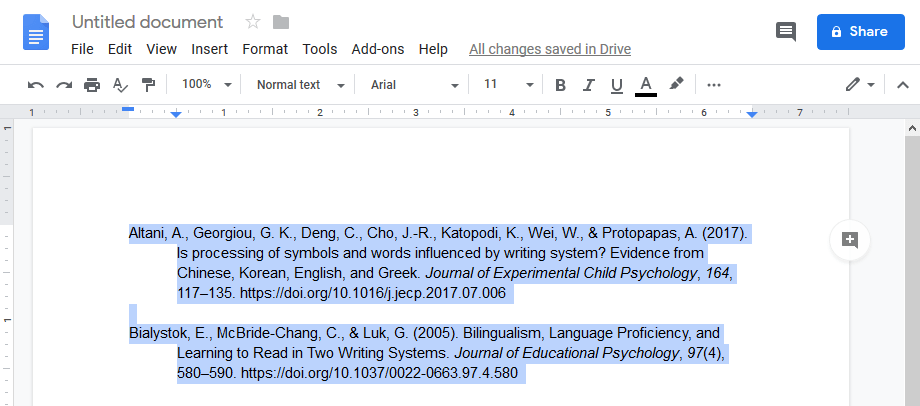
However, a hanging indent is actually the opposite of that. In a hanging indent, the first line usually starts adjacent to the margin while all the remaining lines of the paragraph have a certain constant distance from the margin.
Why do we need Hanging Indents?
Hanging Indents are extensively used in research papers and others when we are writing citations or references. They allow the citations to stand out and make clear where one citation or reference is ending and where the next one is beginning. This makes it easy for the readers if they want to check out a reference while reading a paper.
Is it possible to create a hanging indent in Google docs? If yes then how?
Yes, we can create hanging indents in Google Docs quite easily. You can do so by using two of the available methods. One uses a rule while the other method is by changing the indentation settings. Let’s go over both of these one by one.
Using A Ruler
In order to use a ruler to create a hanging indent in Google docs, follow the steps given below
Open Google docs and create the document you want to format.
Now in the horizontal bar menu located at the top of the screen, click on view. You have to enable on show ruler.
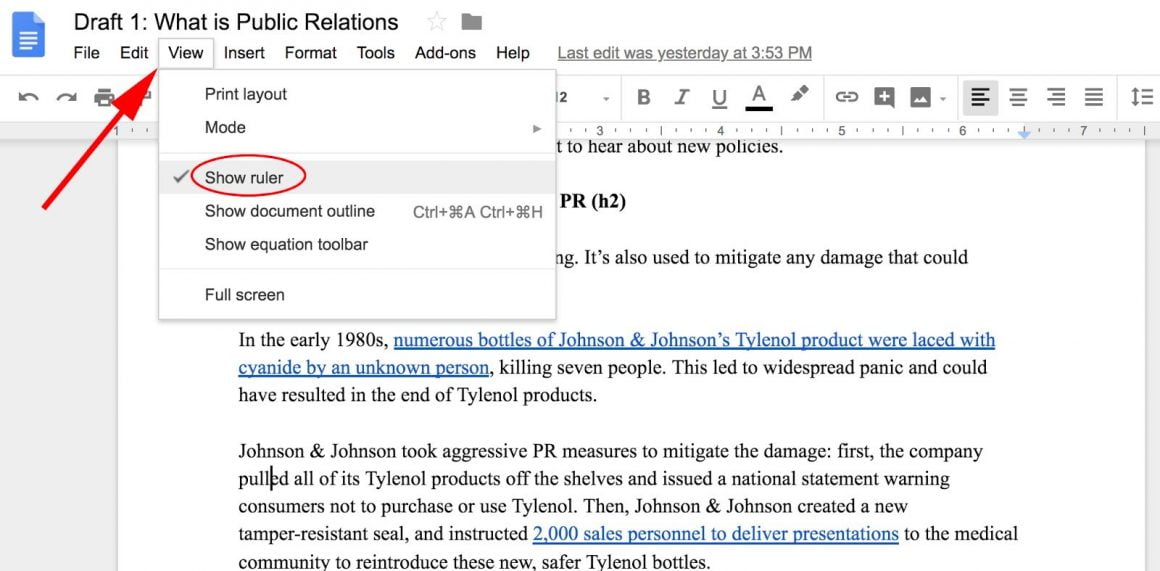
Now select the text you want to create a hanging indent on. You may highlight one or multiple paragraphs.

Now, on the ruler, drag the left indent marker (if you see closely this marker is made of a rectangle and a triangle) to the distance where you want your indent to begin.
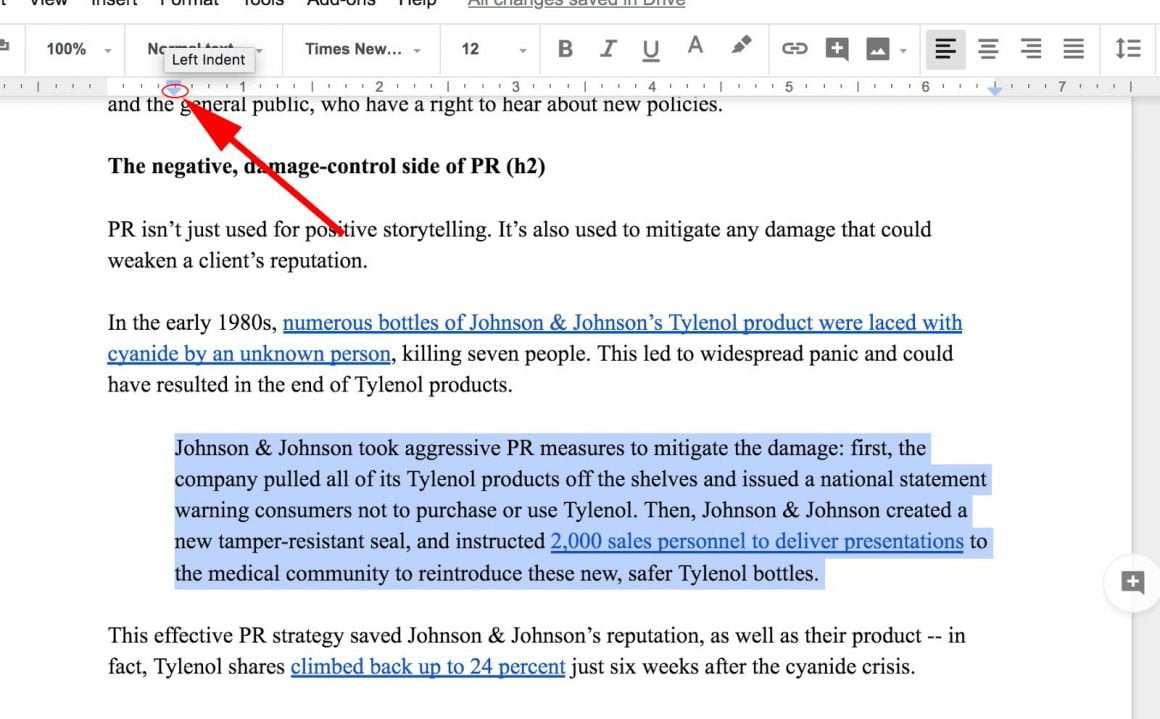
Now, drag the little rectangle (it is the marker for first line indent) and bring it to zero.

There you go, a hanging indent is created.
Using the format setting
Keep on following the steps to create a hanging indent by this method
Select the text which you want to indent.
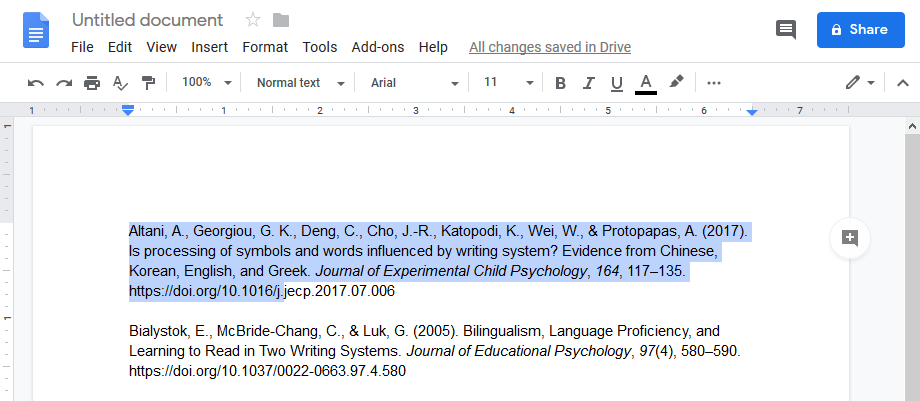
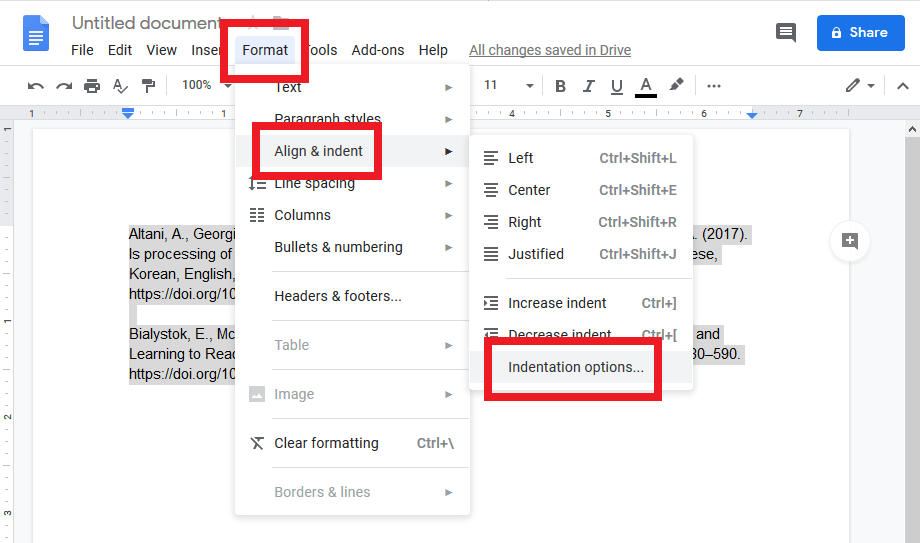
Now, in the horizontal bar, click on format > Align and Indent > Indentation options.
In the options before you, look for special. Then choose hanging from the drop-down menu.
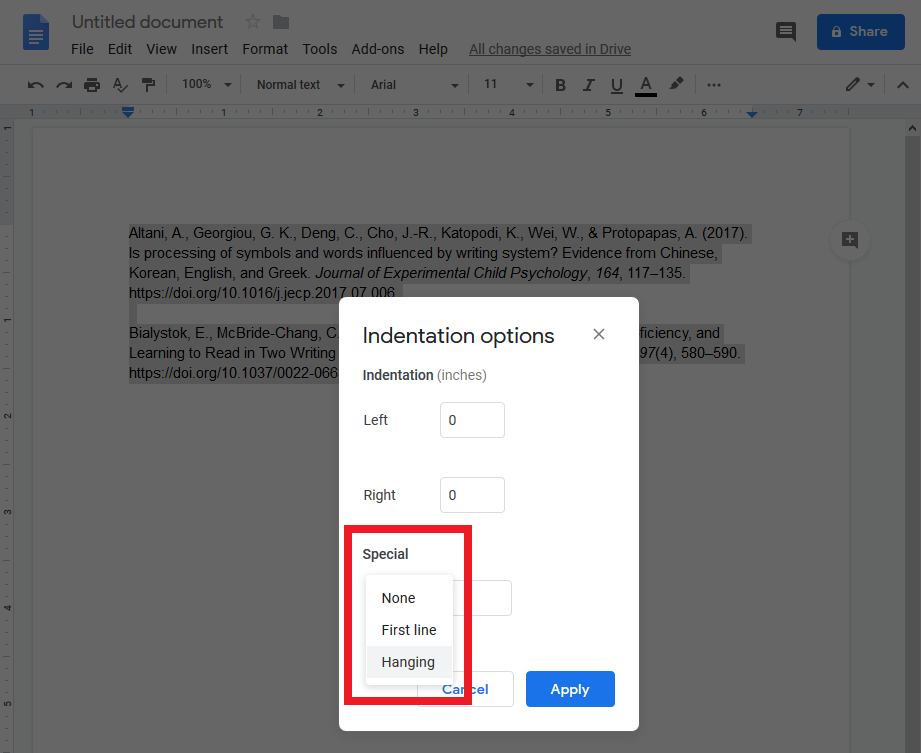
When you choose hanging, the value of 0.5 inches will appear automatically. You may increase or decrease it but this value is used normally. Click on apply and you are done.
To Conclude,
Hanging Indents are used so that citations and references may be seen as separated and easy to read instead of being clumped together. Adding these in Google docs is very easy which proves that formatting may seem difficult to do, but once you get a hang of it, it can be done quickly.