There can be various reasons to take screenshot on Mac. For example, you want to demonstrate any process through visuals in your university assignment or share feedback with team members in your office. Modern computers and laptops have built-in functions that allow users to take screenshots in a few clicks. So, if you’re wondering how to screenshot on Mac, you’re not alone.
In this guide, we’ll share 2 Easy Methods for taking screenshots on Mac. So, without wasting any time, let’s dive into the topic.
2 Easy Ways to Take Screenshots on Mac
There are so many different ways of taking screenshots on Mac but as said earlier, we’ll share the most easy ones.
Take Screenshots with Keyboard Shortcuts
With this method, you can use different key combinations to take screenshots of either the full screen or the selected area.
- Shift Command 3
It’s the easiest way of taking a screenshot. Using this keyboard shortcut will help you capture the full screen, and it will be automatically saved.
- Shift Command 4
This method is used to capture some parts of the screen. In this method, the cursor is turned into a crosshair. You can select the desired area, and when you release the mouse button, it will automatically take a screenshot of the selected and desired area.

Screenshot on Mac Using Shift Command 4
Image Source: https://www.techsmith.com/blog/how-to-screenshot-on-mac/
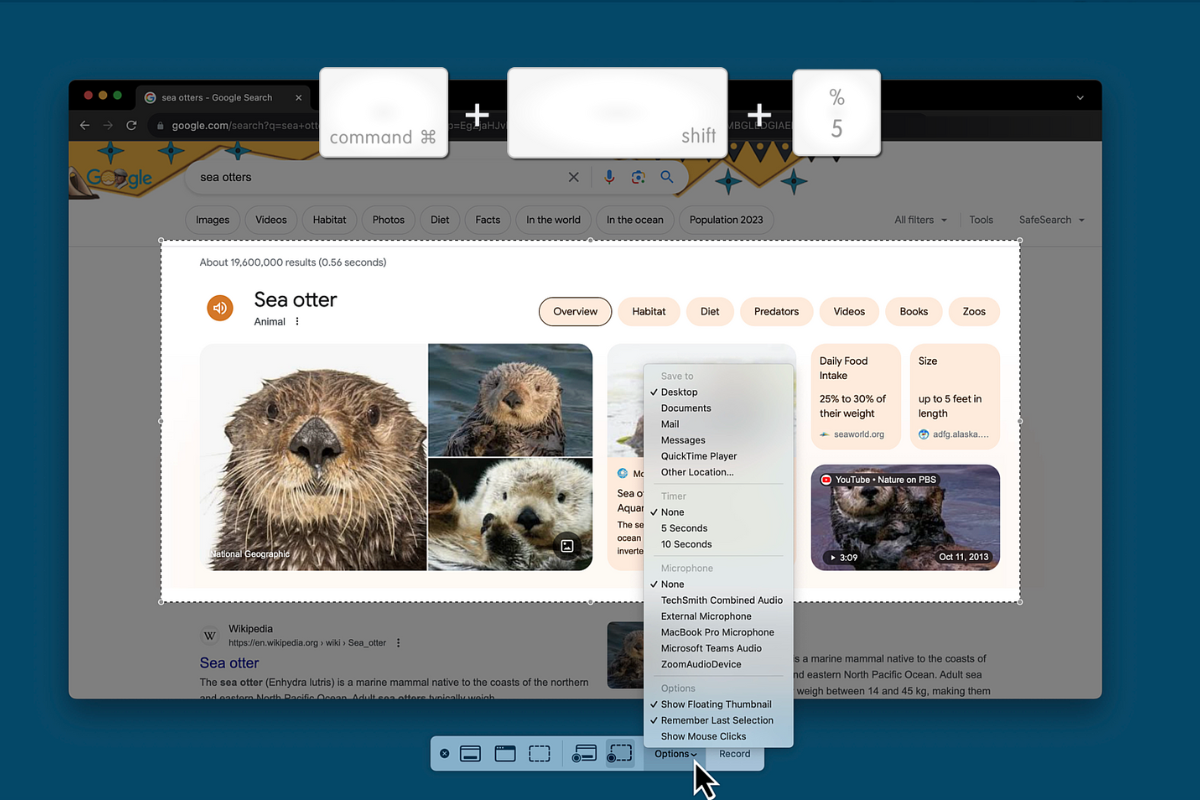
- Command Shift 5
It’s another keyboard shortcut that will open the small screen capture window. Here, you can use three screenshot buttons to perform the following actions:
- Capture a single window
- Capture the entire screen
- Capture the portion of a screen

Screenshot on Mac Using Shift Command 5
Image Source: https://www.techsmith.com/blog/how-to-screenshot-on-mac/
Take Screenshot with 3rd Party Applications
If you don’t want to use any of the methods mentioned above, you can try a third-party app. There are various apps that come with advanced screen capture and screen recording features. You can try their free trial and if they’re up to your expectations, you can purchase their premium versions. You can search for these applications online and try one according to your needs.
How to Manage Screenshots on Mac?
Earlier, we discussed how to screenshot on Mac. Now, we have a screenshot, but the question is how can we organize and manage it. The best tip for organizing a screenshot is to name it. By default, screenshots are saved as “Screenshot” with date and time. But the best approach is to set names for screenshots so that you can easily find them.
If you want to copy a screenshot on the clipboard, ensure that you press and hold the “Ctrl Key” when you take a screenshot. It will help you paste the screenshot wherever you want. Mac devices have a “Universal Clipboard” that allows you to paste the copied screenshot on any other Apple Device.
Final Words
In this guide, we tried our best to answer “How to Screenshot on Mac” in the easiest way. We have shared some ways that can help you take screenshots without any effort. If you have any other ideas, don’t forget to share them with us. See you in the next guide.