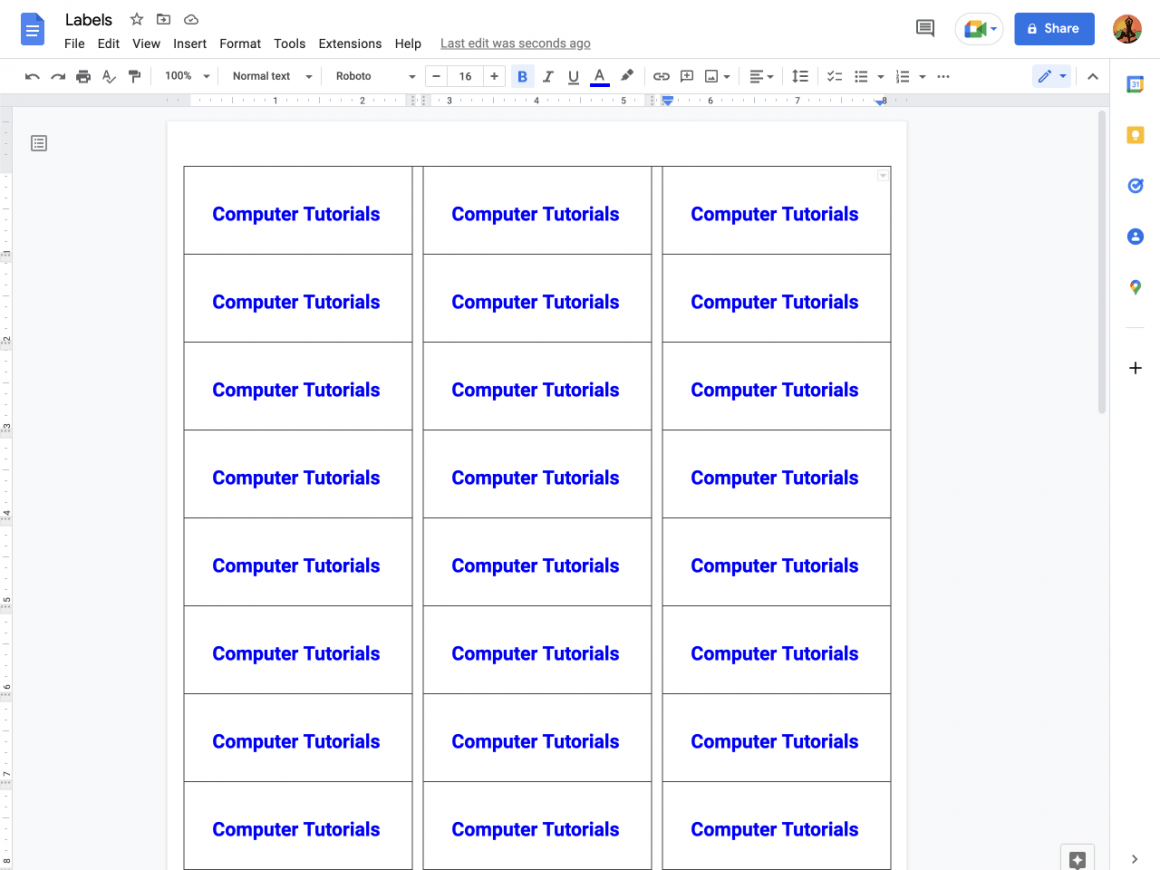
Google Docs is an excellent one-stop solution for all our document problems. You can make anything, even labels. However, you might need to install an add-on for it to be easier.
The best in this regard could be the Foxy Label add-on, which allows you to easily create shipment labels, address labels, and even QR code labels. It has thousands of ready-made templates compatible with different label providers like Avery. To see how easy it is, let’s go through the steps below
1. Install Foxy Labels
There are two ways that you could install add-ons in Google Docs. First, you could install the add-on from the Google add-on catalog page or directly from Google Docs by going to Extensions → Add-ons → Get add-ons and searching for Foxy Labels.

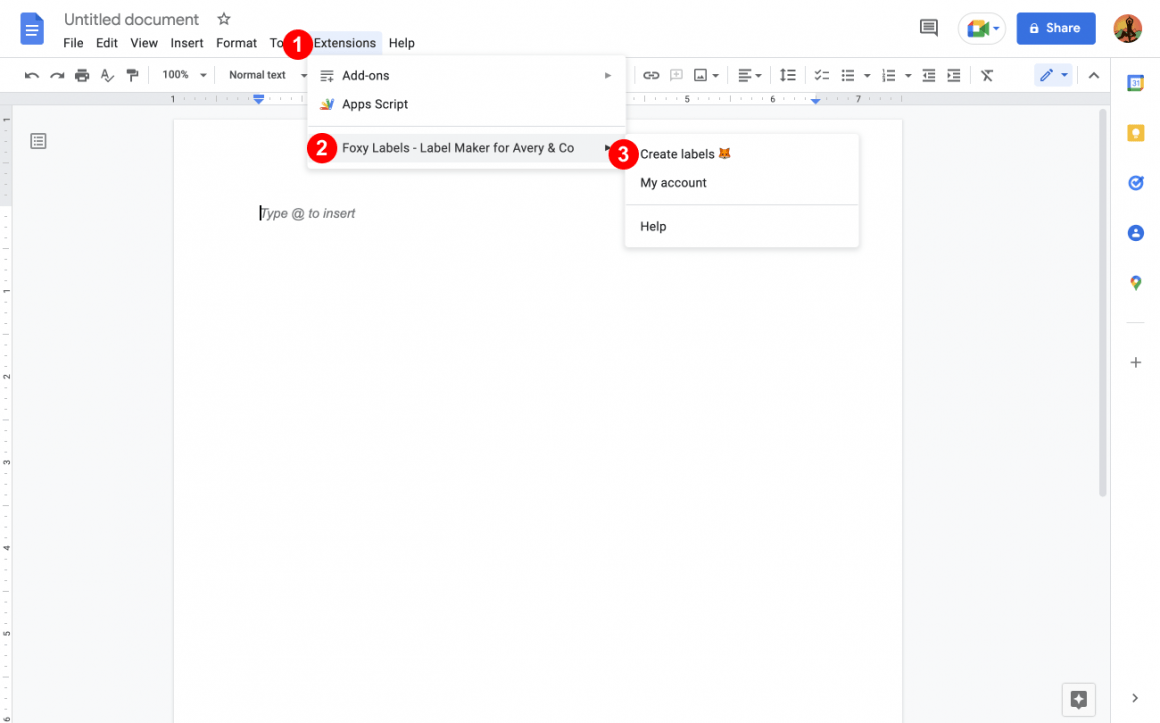
Once you’ve finished with the installation process, open Foxy Labels by going to Extensions → Foxy Labels → Create labels. You will see the add-on open in the sidebar on the right.
2. Choose a Template
This is the step where you decide what template you want to use. Templates are compatible with a variety of label makers, including Avery, OnlineLabels, etc.
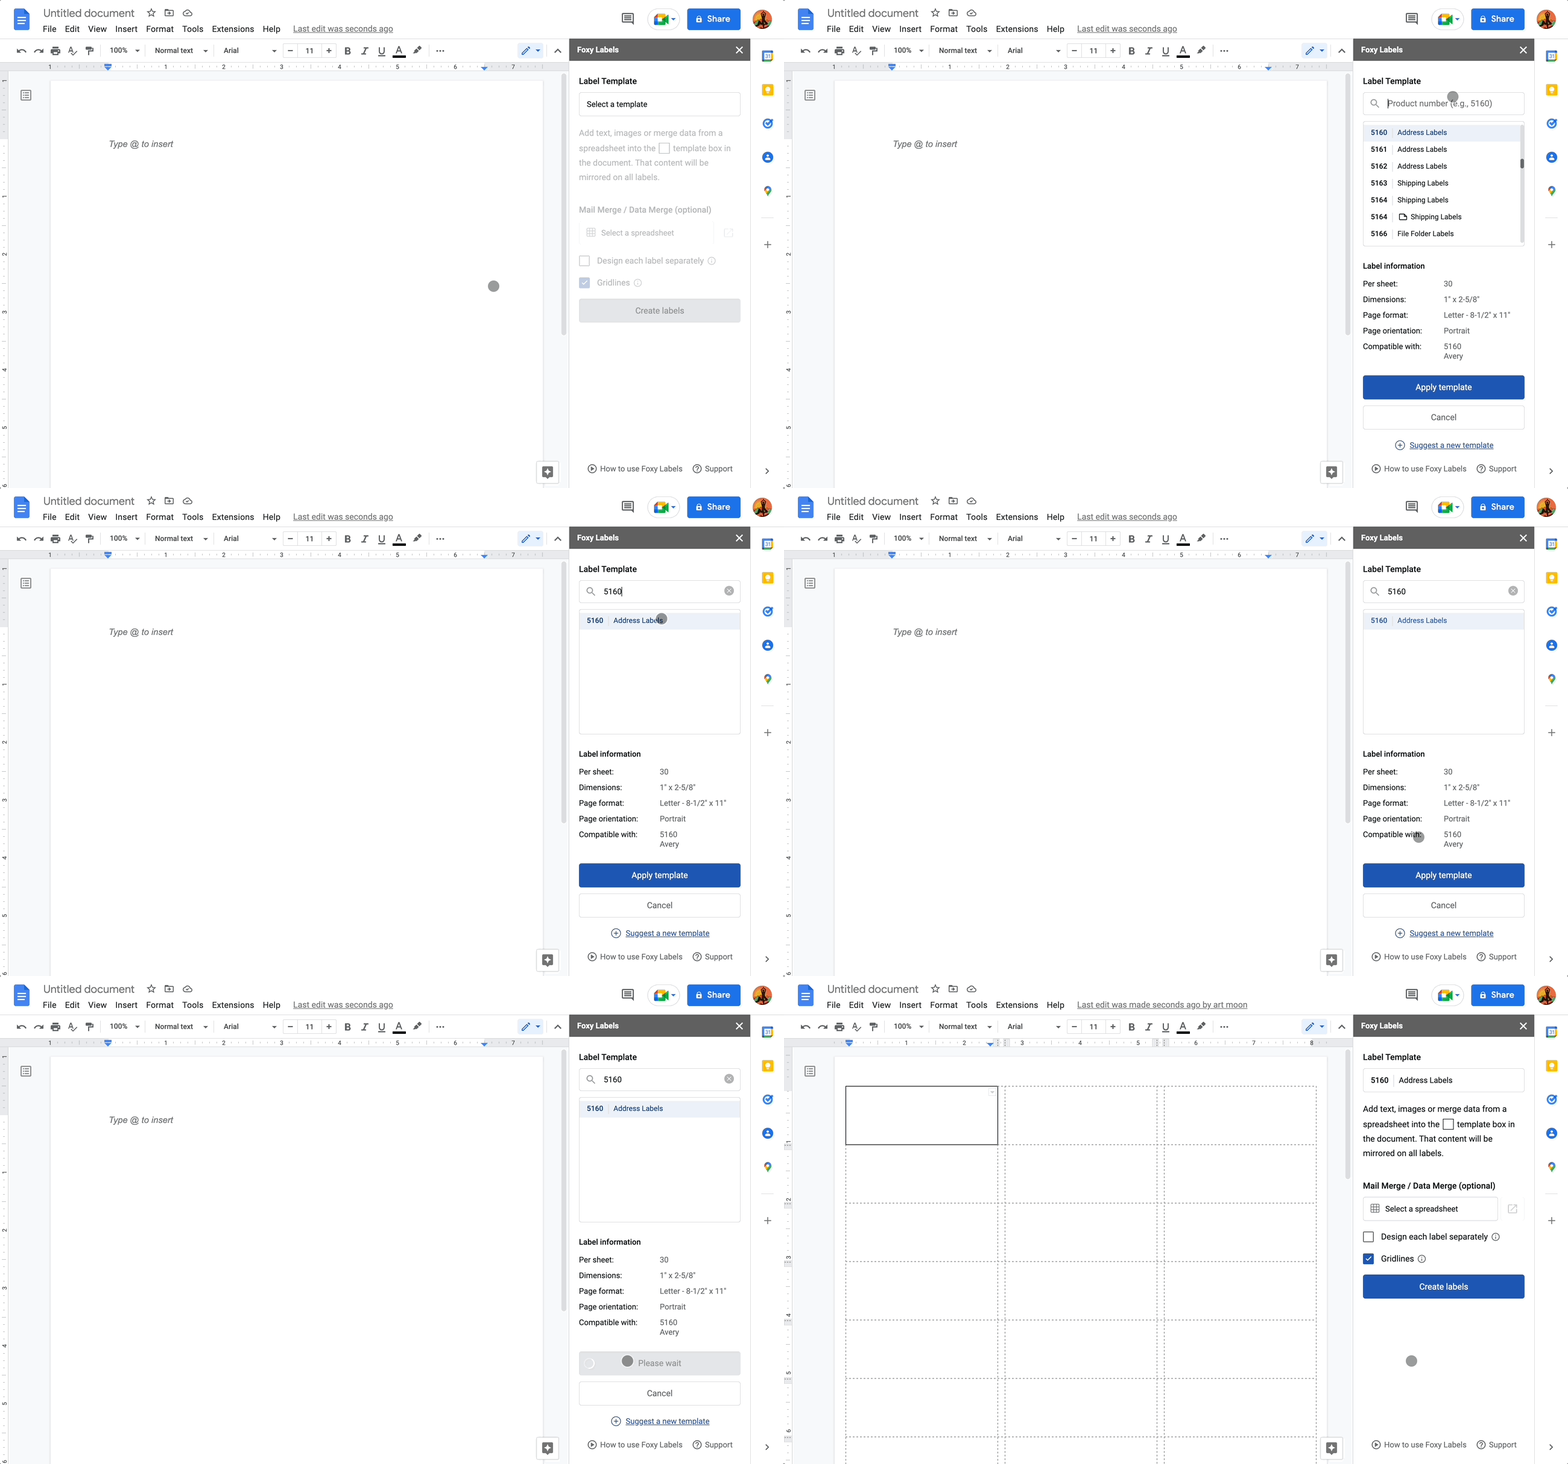
Click “Select a template” and then use the search bar to find the required template.
The detailed label information appears at the bottom.
Click “Apply template.”
3. Edit the labels
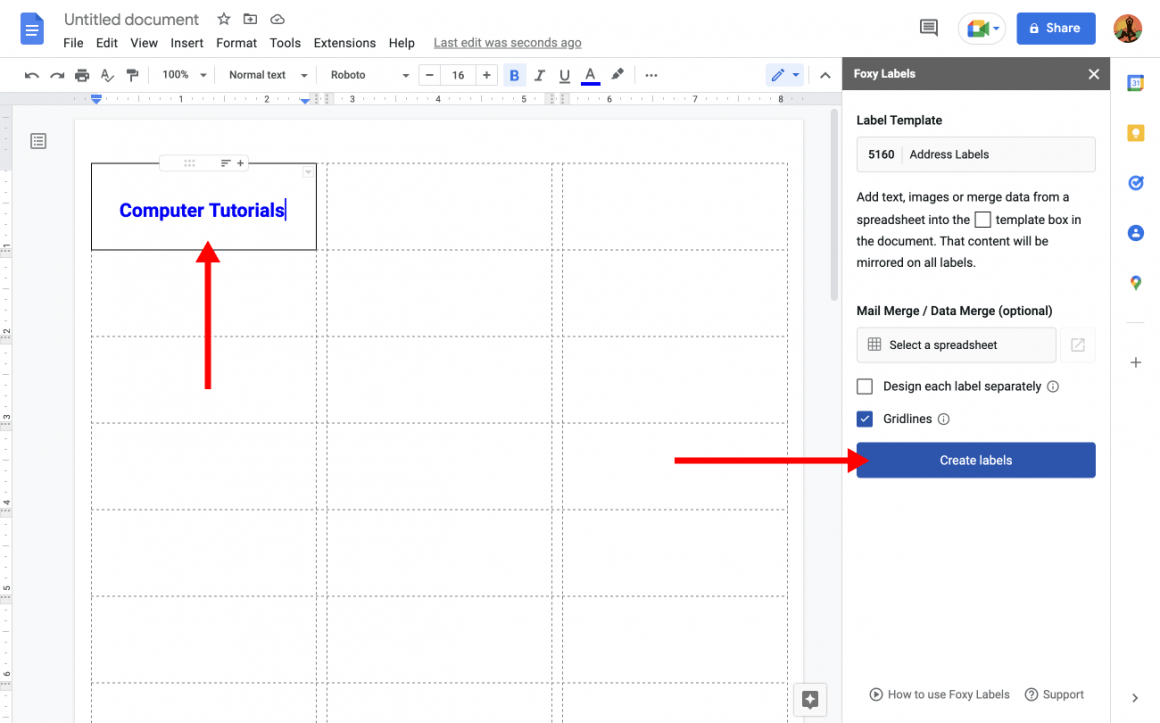
Modify anything inside the very first cell, from text style to text size, apply bold, italics, etc. This style used in this first cell will be replicated over every other label. You can alternatively select the “Design labels separately” option to adjust the layout of each label individually.
PRO TIP
To merge data, such as a mailing list from Google Sheets, click “Select a spreadsheet” and select “merge fields” into the first cell.
Click “Create labels” to generate labels.
Once you’ve completed the process, you can now open the final document. Click on “Open.”
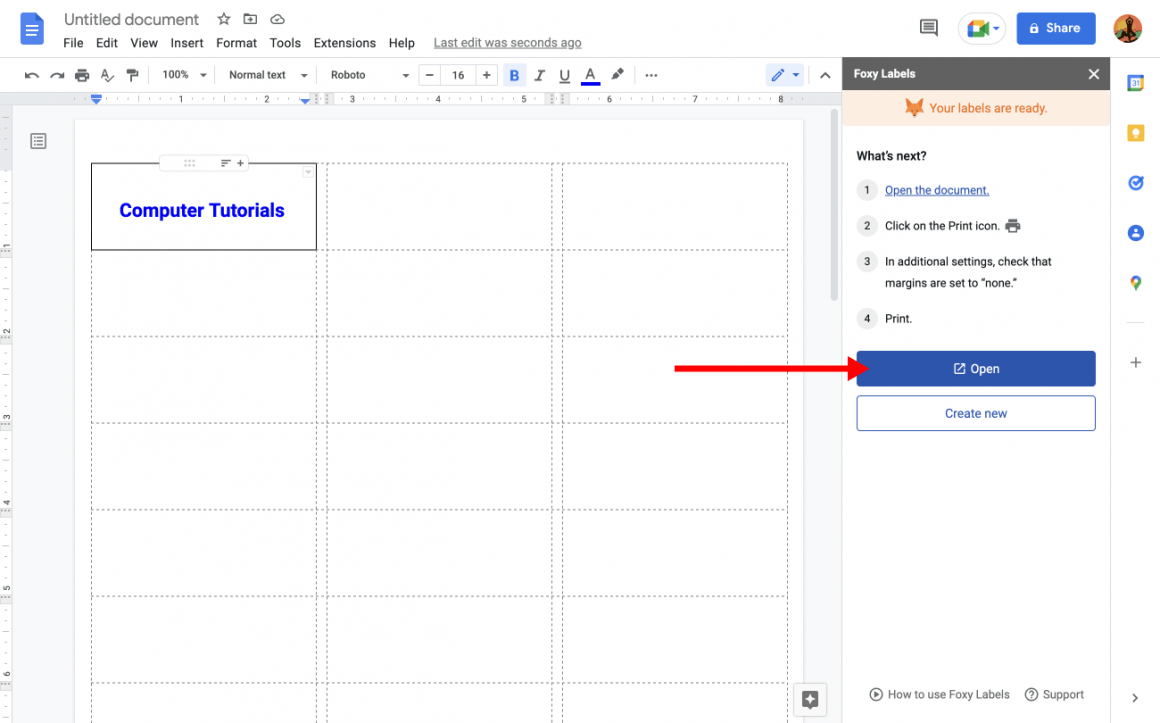
4. Print labels
You can now see the generated labels right in front of you. If you need to print them immediately, you can do so with a few clicks. Click on this print icon.
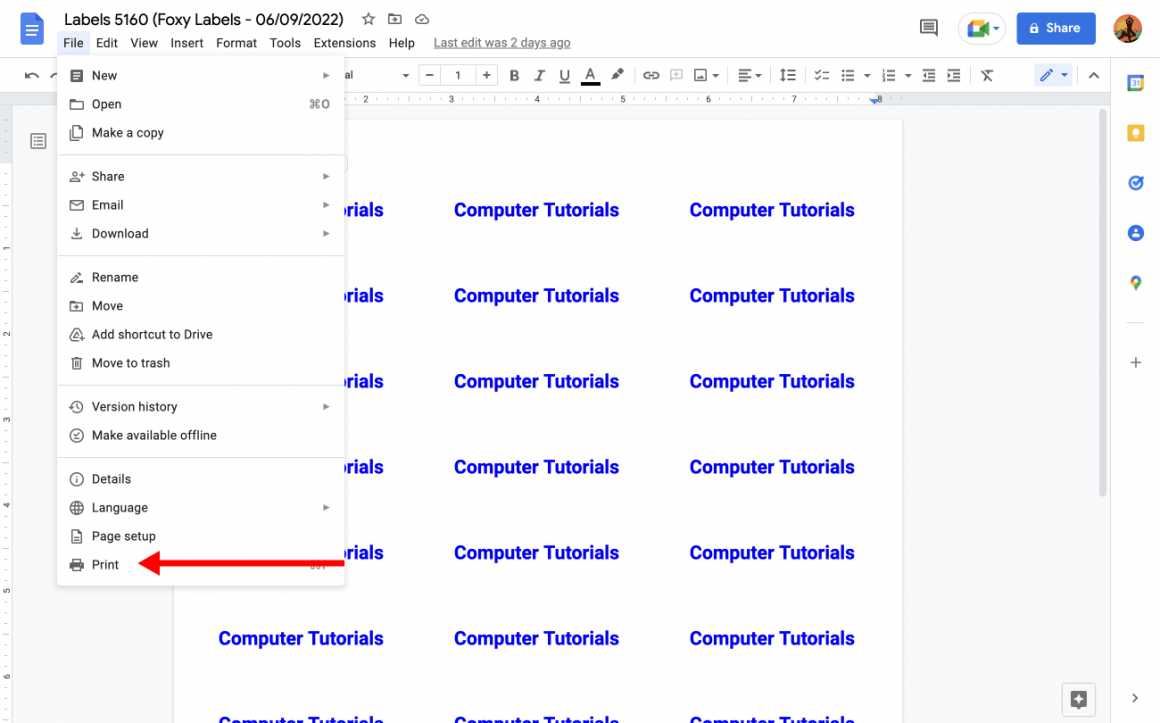
You should always ensure that, before printing, you have put the appropriate label paper in the printer machine. You should also ensure that margins are set to “none” in the new window that opens.
Video Tutorial
Et voila! At this point, you’re done and have successfully created and printed labels using Google Docs. It’s really easy, and once you get the hang of it, you should be able to complete the setup process in minutes.
1 comment
i’ve gone nuts typing out 5366 labels only to have them shift and print short on the lavels, thus cutting most of them in half or worse.
I hope the margins set to “none” will fix the nightmare. A friend mentioned the solution is in resetting the Brother printer, which I dont know how to do…
Thanks for writing in a way a 69 yr old novice could understand!