Google Contacts, like many other Google apps, comes packed with plenty of useful features for everyday users. But what happens when you need something a little extra—features that go beyond what the standard app offers? That’s where third-party developers step in, creating powerful add-ons that boost the functionality of Google’s built-in tools.

One such great app is Shared Contacts Manager, which opens up new business possibilities. It allows you to securely manage and share customer, client, or partner contact information among your co-workers. With hundreds of 5-star reviews and thousands of active users, the benefits of this app speak for themselves.
Now it’s your turn to give it a try! The 14-day free trial provides plenty of time to get familiar with the app and explore all the advantages it offers.
Install Shared Contacts Manager
Go to the Shared Contacts Manager page on the Google Workspace Marketplace and click Install. The installation process will guide you step by step. First, select the Google account you want to use with the app. Then, review the permissions Shared Contacts Manager requires and allow all necessary access permissions by selecting everything and clicking Continue.
PRO TIP
Installing the app across your entire domain unlocks more features and simplifies contact management even further. Ask your domain administrator to install Shared Contacts Manager domain-wide for maximum efficiency.

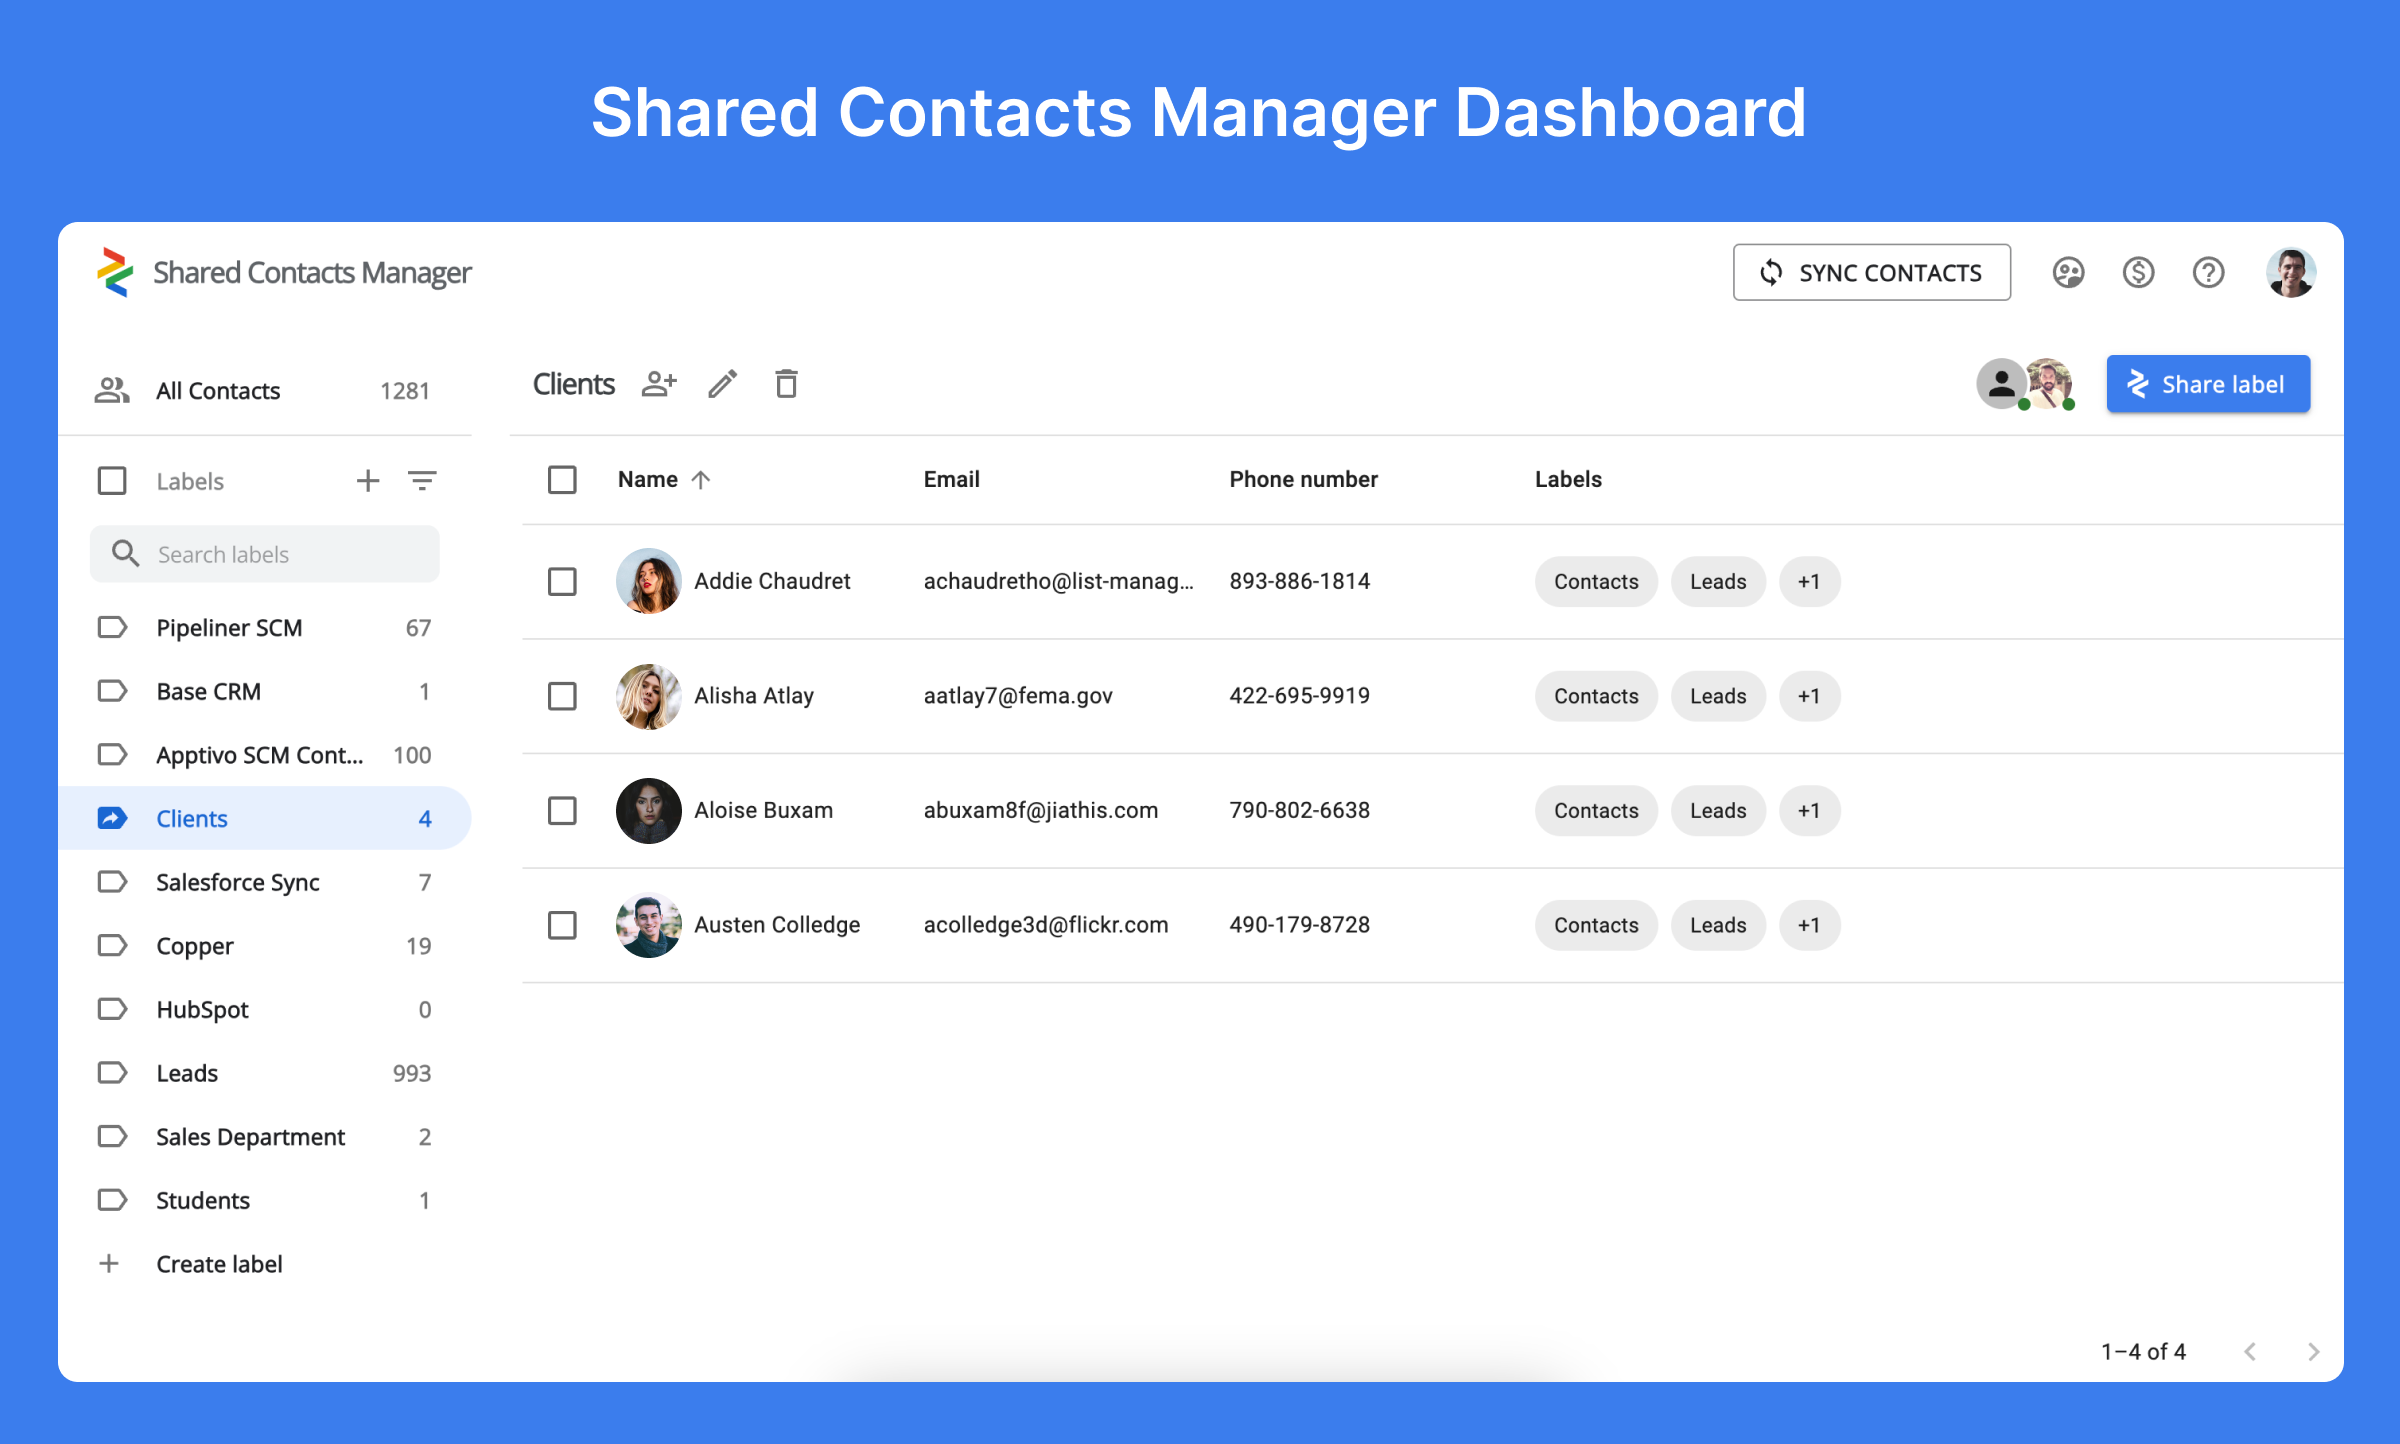
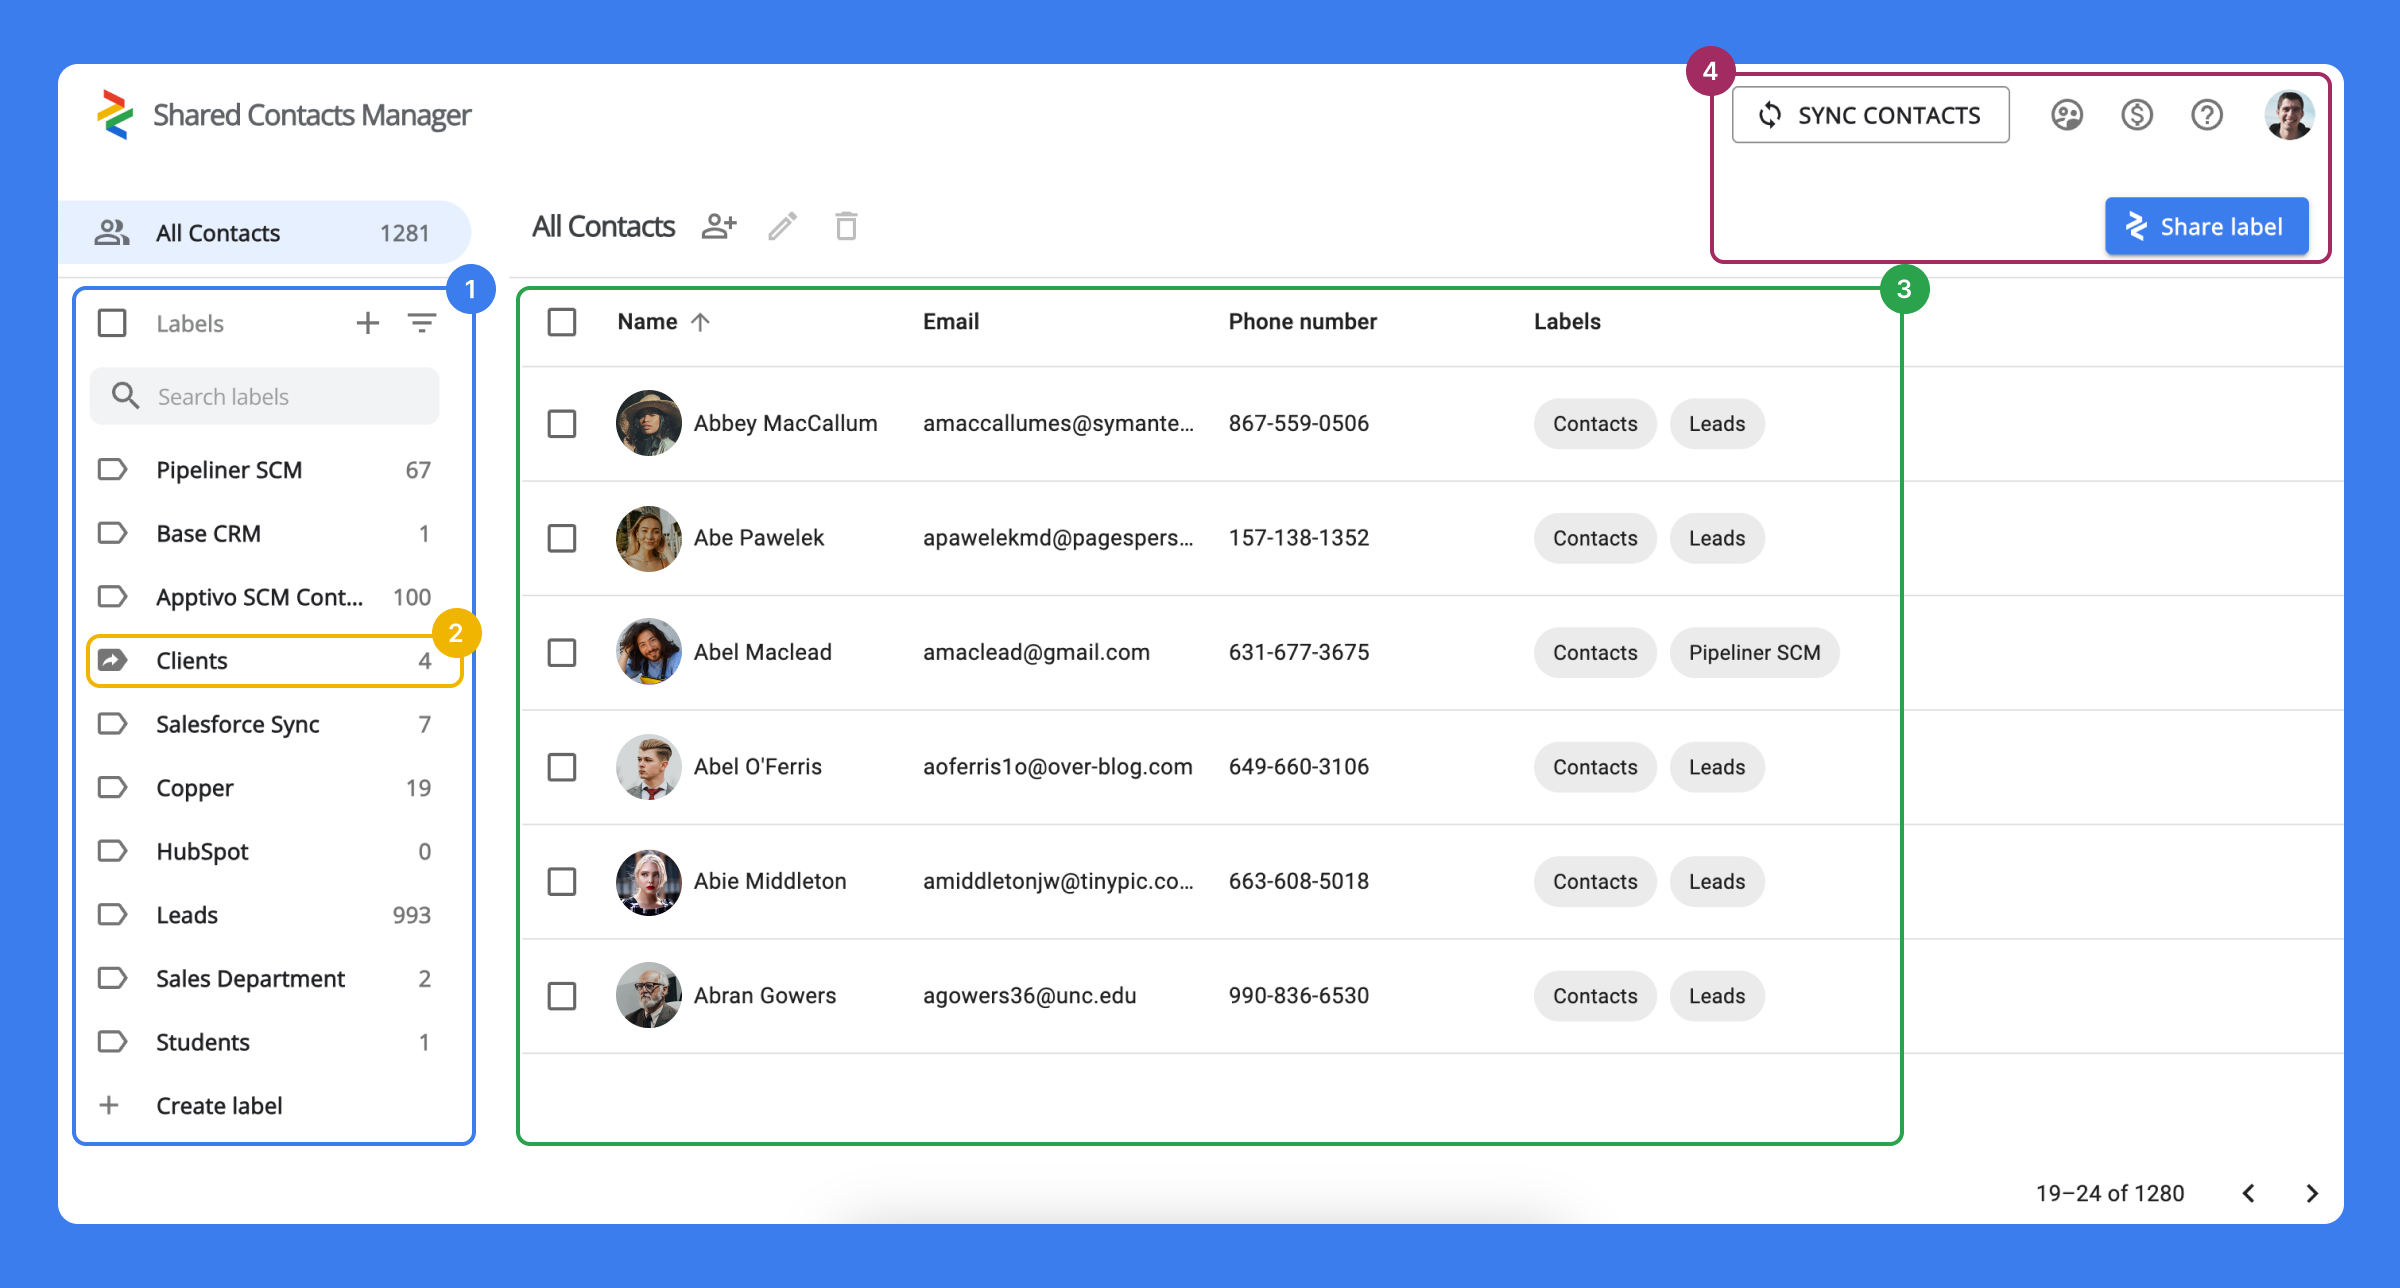
Once the app is installed, you can launch it and explore its simple, functional dashboard. Let’s take a closer look at its key areas.
- Labels. On the left side of your screen, you’ll find a list of all contact labels in your Google Contacts.
- Shared Labels. Easily distinguish shared labels by their arrow-like icon, while unshared labels have blank icons.
- Contacts in a Label. In the center of the screen, you’ll see the contacts within your selected label. To view all contacts and the labels they belong to, click All Contacts just below the app’s logo on the left.
- App Management Tools. In the top-right corner, you’ll find tools for managing the app, such as subscription and payment details, user management, and customer support options.

Create a Contact Label
To successfully share contacts, they need to be assigned to a specific label. You can share your existing labels, but it’s often better to create dedicated labels for sharing that contain only the targeted contacts you want to distribute.
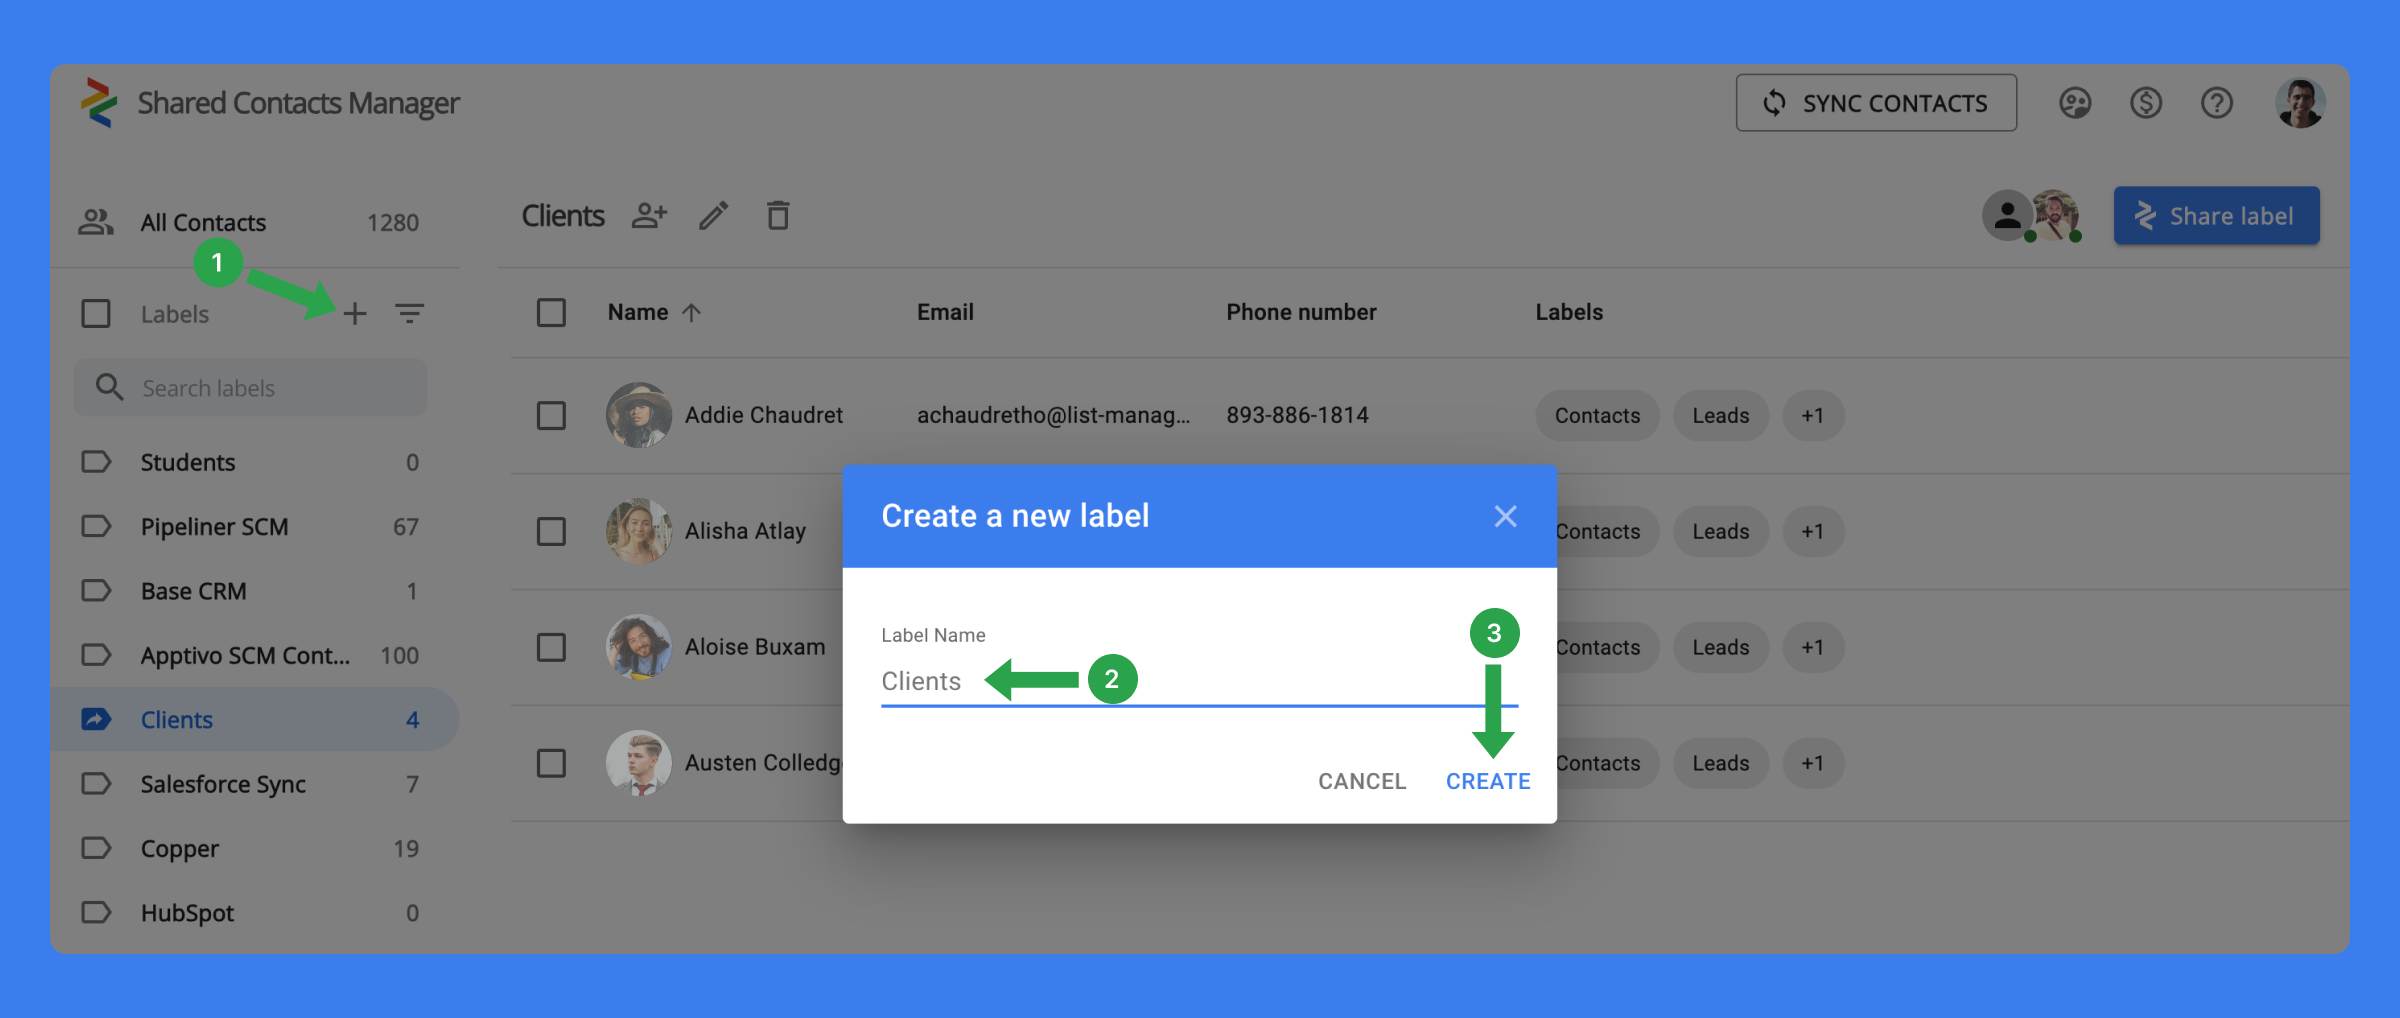
Here’s how to create a new label:
- Click the “+” icon in the left-hand sidebar.
- In the pop-up window, enter a name for your new label.
- Click Create to finish.

Now that you’ve created your label, the next step is to add the necessary contacts and share it with your team members.
Share the Label With Users and Domain User Groups
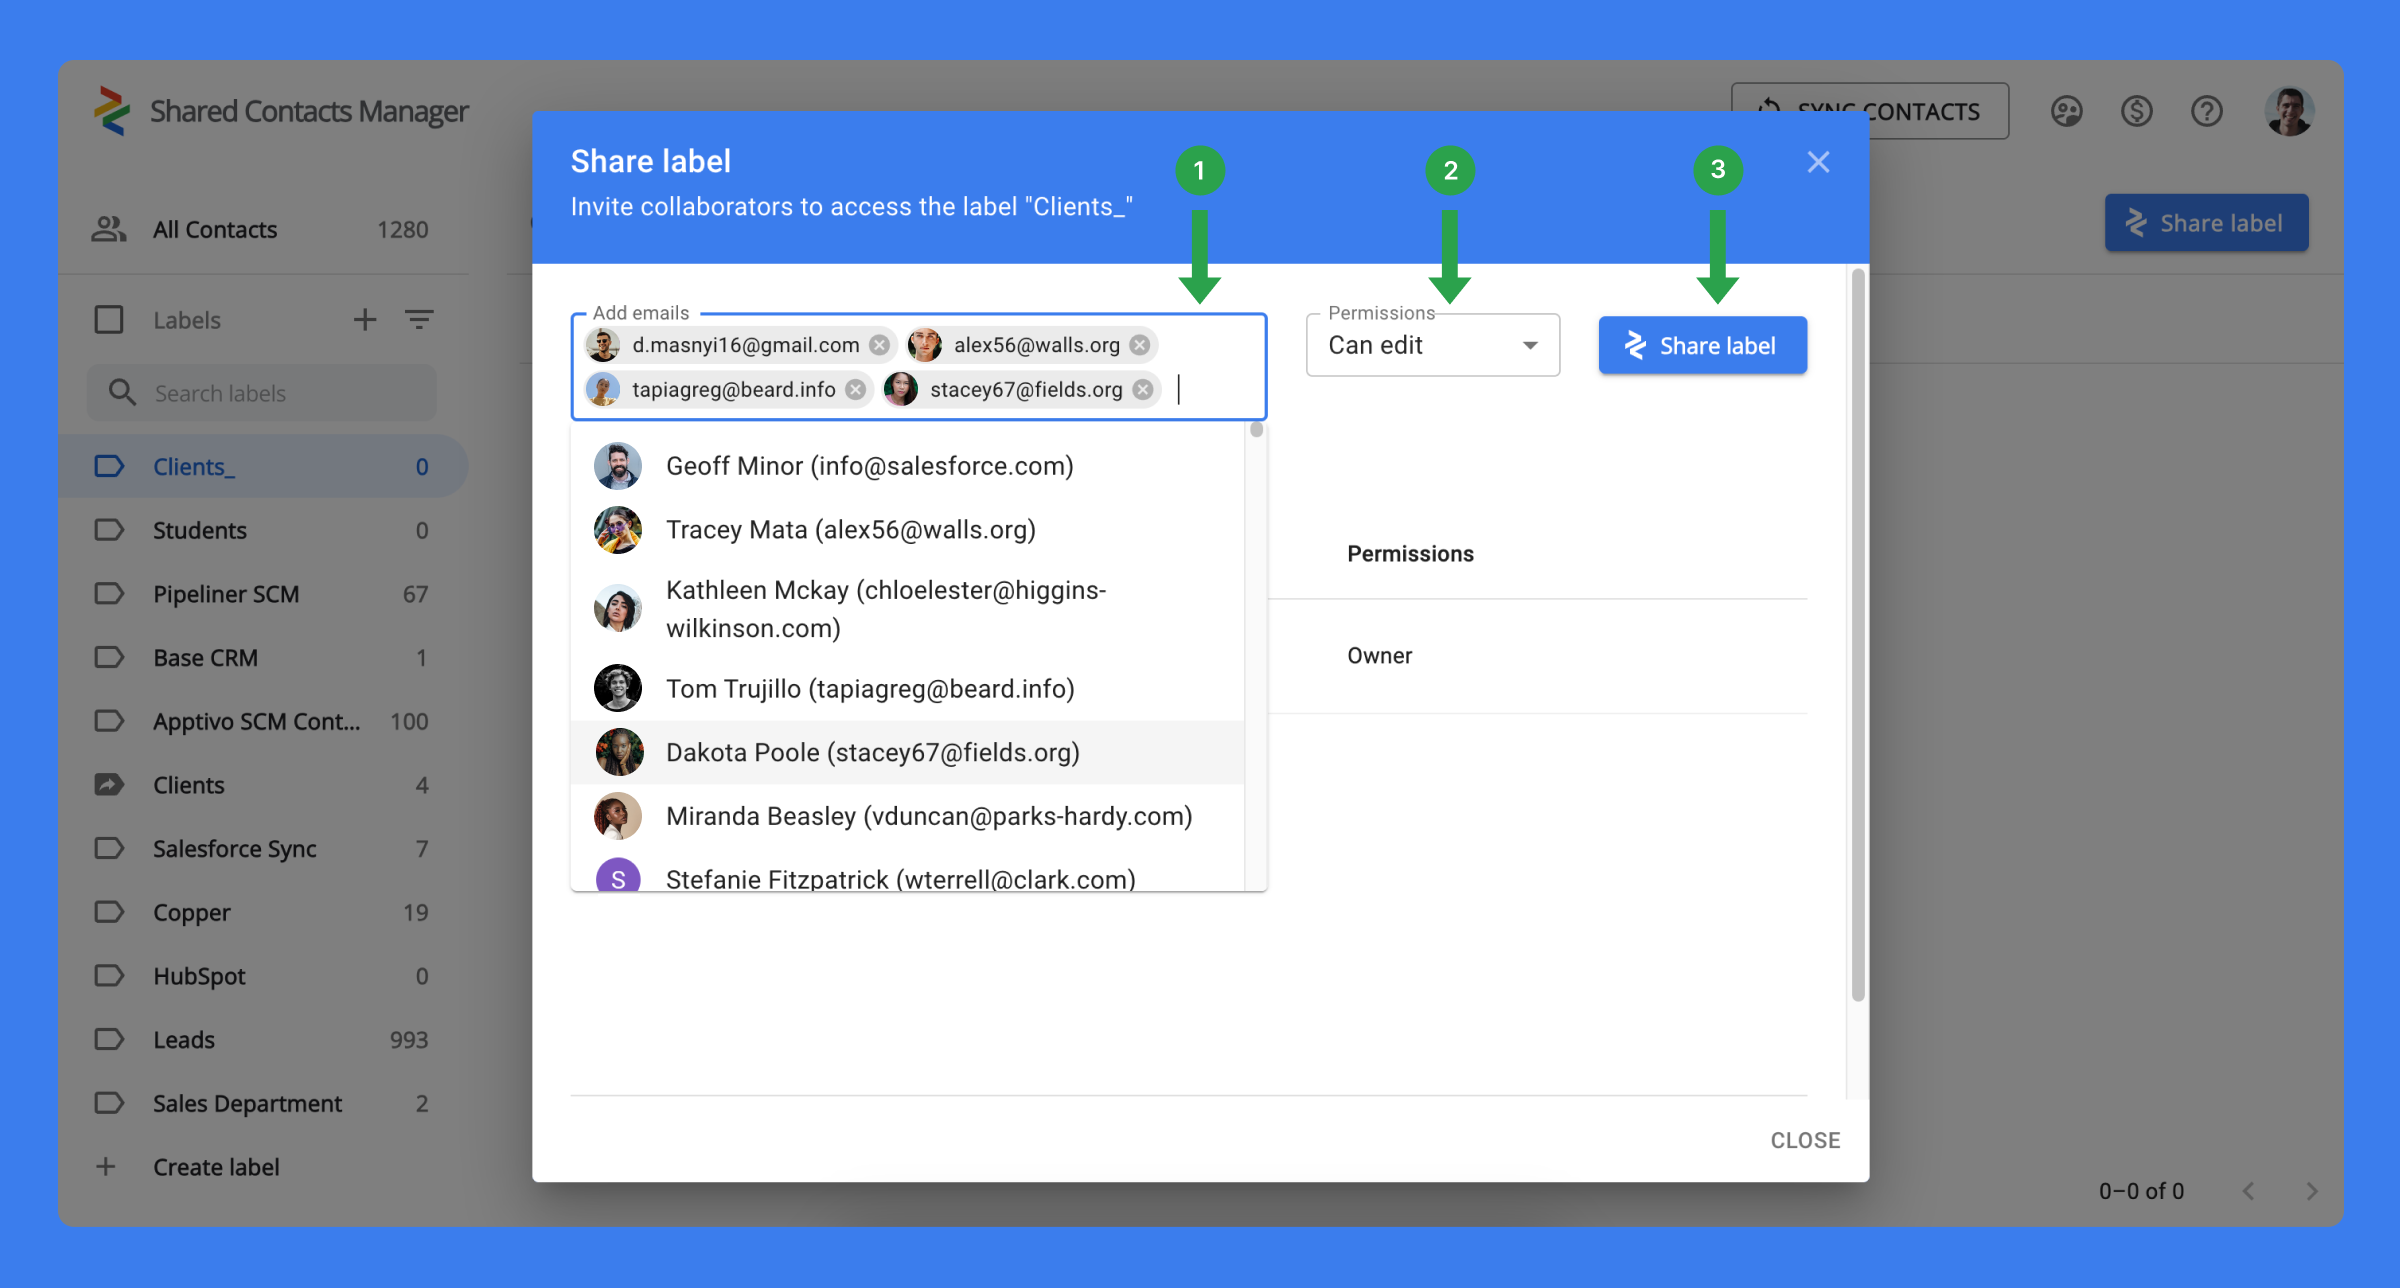
After you press Create, a new window will appear where you can add people to share the contact label with and set their permission levels.
- Add users: Click inside the Add emails box to bring up your contacts. A drop-down list will show all available users. You can scroll through the list or type names or email addresses to find people faster. Click each name to add them to the list of people with access to the shared label.
- Set permissions: Select a permission level that determines what each team member can do with the shared contacts (e.g., view-only, edit, reshare, etc.).
- Share the label: Click Share label to finalize. Depending on the number of contacts and users, the process may take up to 15 minutes. You can safely close the window without waiting for the sync to complete.

Now, you and your colleagues can access the shared contacts from any device, wherever they are. Any software connected to a Google account will also have access to these shared contacts.
PRO TIP
Using user groups in Google Workspace not only simplifies contact sharing but also ensures your teams stay updated without additional work. Combine this with Shared Contacts Manager’s automated label sharing, and new users will have immediate access to the contacts they need from day one, saving you time and effort.